Sunday 11 December 2016

OIM 11g R2 - How to Create Approval Policy.


In this post I am creating Approval Policy for provisioning Application Instance. This Approval Policy will be initiated when Application Instance request is raised. In the same way we can create Approval Policy for other operation.


OIM Version – 11g R2 PS1 & 11g R2 PS2


Login to Identity System Administration console and go to Approval Policies Tab.


In PS1 and PS2 we have to create two approval policies, i.e one for Operational Level and other for Request Level.


Creating Operation Level Approval:


Click on highlighted icon.


Provide required information.


Select composite.


 Click Next.


Provide Rule Name and then click Add Simple Rule.


Provide required information.


 Click Next.


 Click Finish.


Operation Level Approval Policy is created successfully.


Creating Request Level Approval:


Click on highlighted icon.


Provide required information and then click Next.


Provide Rule Name and then click on Add Simple Rule tab.


Provide required information and then save.


Click Next.

Click Finish.


Request Level Approval Policy is created successfully.


OIM Version – 11g R2 PS3


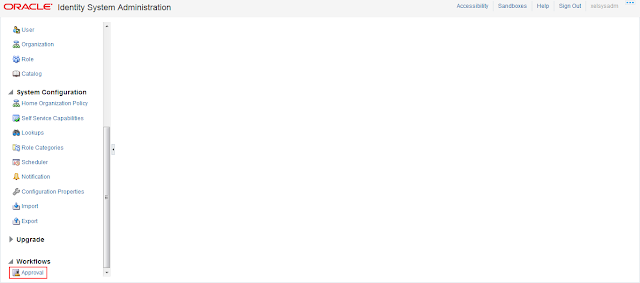
Login to Identity System Administration console and go to Approval Tab.


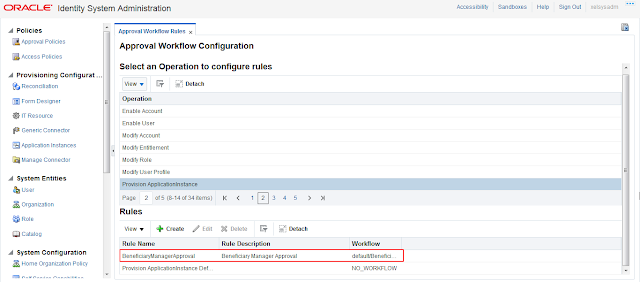
Select Provision ApplicationInstance and then click Create.


Provide information as shown in below screen shots.


Select "Operation".


Select "Application".


Click on value and then select Provision "ApplicationInstance".


Select "Workflow Name.


Select Composite.


Click on Create.


Approval Policy is created successfully.


Happy Learning!!!

OIM - Some UDFs are missing from Reconciliation Field mapping in the Design console?


Some time It may happen, you have created UDFs and some UDFs are not visible in Reconciliation Field mapping. Even though those fields are present in the view form in sysadmin UI and in the USR table in database.

This can happen of the custom UDFs created in the USR table are not being pushed to the SDC table. The Reconciliation Field Mapping will be refered from SDC table.


You can verify if they exist in SDC table:

select sdc_name, sdc_label, sdk_key from sdc;


Solution:
In this case, since the SDC table is missing the UDFs, you have only 2 options:


1. Restore OIM Schema to before the UDFs were created and then create again.


2. Modify display name of UDFs which are missing in SDC table from System Administration Console and then create new UDFs with same display name.(Note: As UDF Name is referred unique value in database, so you have to provide unique name).


Saturday 10 December 2016

OIM 11g R2 PS3 - Adding UDF(User Defined Field) or Custom Field with Seachable Picklist on User Page.


A searchable picklist (ADF name input list of value), from which users can search and select the value.


Login to System Administrator Console using "xelsysadm" credential and click on "Sandboxes".


Click on Create Sandbox.


Give sandbox name and click on Save and Close.


Go to User tab.


Click on new icon as highlighted in below screen shot.


Select Field Type as "Lookup".


Enter required details.


Select/Create Lookup which you want to bind with this custom field. I am selecting "Lookup.Users.Role" lookup for this example.  


If you want to create a searchable picklist, then you have to select Searchable Picklist under the Advanced section.


Click  “Save and Close”.


 Custom field is created.


Go to Manage Sandboxes and deactivate the sandbox.


Login to Identity Self Service console using "xelsysadm" credential.


Now to add the custom field "User Role" on Create User Page, follow the below steps:   


Activate the sandbox.


Go to "Manage" tab.


Click on Users tab.


  Click on Create.


Click on customize on top right corner of the Identity console.


Click on Structure tab.


Click on the panel where you want to add this custom attribute and then click on add symbol.


Open Data component-Catalog.


 Open userVO.


Search for added custom field and click on Add.


Select the option : ADF Input List Of Value.


Click on Close button.


Go to manage sandboxes and publish sandbox.


We can see, "User Role" custom field added successfully.


Related Posts :


Happy Learning!!!